
How To Use Self-Tapping Screws
Many types of screws are available. Some screws require prepping and drilling before they can be used. But there is one type of screw that doesn’t need any prepping or drilling to install, which means it’s perfect for when you don’t have the right tools at hand.
“Self-tapping” is just another name for a “screw.” However, these self tap screws are designed with an extra feature that makes them much easier to use than other types of screws.
This special feature is called a “self-tapping” tip. Self-tapping screws are great because you can thread them into wood with ease without having to drill holes first. They also make installing drywall, metal studs, and wooden molding significantly faster and easier than using conventional screws.
In this article, we’ll take a look at how to use self-tapping screws.
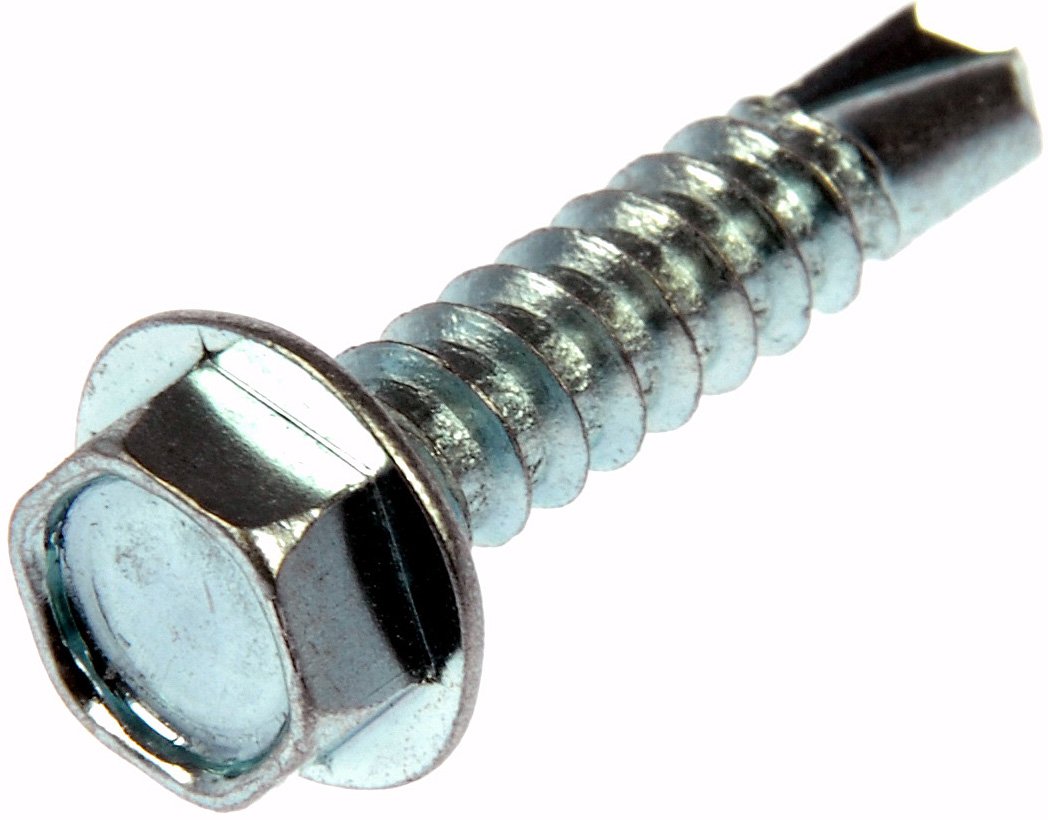
What does a self-tapping screw look like?
A self-tapping screw usually has two parts: the head and the shank. The shank is what will eventually go into your work piece. It starts out as a long rod made from steel, aluminum, or other materials. At the end of the shank, there is a pointy bit called the “self-tapping” tip. This tip is what will actually pierce the work piece during installation.
The self-tapping tip is sharpened in the middle so that the head of the screw can grab onto the surface of the workpiece. When the self-tapping tip penetrates through the surface, it causes indentation on the opposite side of the workpiece. This indentation creates space where the head of the screw will fit snugly against the workpiece. Once the head is inserted, the shank of the screw can be turned until it’s fully seated. That’s all there is to it!

How do you know if you have a self-tapping screw?
If you’re wondering whether or not you’ve got a self-tapping screw, don’t worry. There are some clues that will help you figure it out. First off, all self-tapping screws should have a square head.
You may also notice that most self-tapping screws have a pointed tip at their end. If you see a flat end instead of a pointed tip, you probably don’t have a self-tapping screw. Flat tips only come in handy when you’re trying to attach things like metal framing and drywall.
Other types of screws vs. self-tapping screws
Sometimes you might find yourself dealing with more than one kind of screw. For example, there are common nails, lag bolts, and screws available. In most cases, you’ll want to pick up the appropriate screw for the job.
Screws for self-tapping
There are plenty of different self-tapping screws available to choose from. Most of them are constructed like regular screws but have a specific tip design that allows them to penetrate wood easily.
Some of the most popular self-tapping screws include:
Crown
Dentiliner
Driveline
Flathead
Ratcheting
Roundhead
Squarehead
Woodhead
For many projects, you won’t need to spend a lot of money on a specialized self-tapping screw. You’ll be able to get by with something like a standard screw. However, if you plan on doing lots of DIY projects over time, you definitely want to invest in a good set of self-tapping screws. These will save you tons of time and effort once you start working on larger jobs.
Common uses for self-tapping screws
While they’re primarily intended for woodwork, self-tapping screws are also useful when installing tile, metal framing, drywall, and plasterboard. Because of their versatility, self-tapping screws are often referred to as toggle fasteners or expansion fasteners.
Toggle fasteners are often used in carpentry, construction, and home improvement projects. By attaching items such as trim, molding, cabinets, and wall panels together, they provide an effective way to secure them temporarily while finalizing the project.
How to use a self-tapping screw
Once you have the proper screw on hand, let’s talk about how to properly install it.
1. Choose the correct tool
Before you begin installing a self-tapping screw, you must first determine the best type of screw to use. If you have the wrong self-tapping screw, you could damage your work surface.
Here are several factors to consider when choosing between different types of self-tapping screws:
Material
Shape
Size
Tip style
Color
Shape
Thread pitch
Head size and shape
Type of material
Shaft length
Once you have determined the type of self-tapping screw that best fits your needs, you can move forward with installation.
2. Prepping the surface of the workpiece
When dealing with wood, you should always pre-drill holes for self-tapping screws. The reason why this is important is because self-tapping screws tend to strip if they don’t have something to grab onto.
3. Place the tip of the screw into the hole
To ensure that your self-tapping screw goes in straight, you should make sure that the tip of the screw is resting squarely in the center of the hole you drilled. If the tip isn’t centered, your screw will be harder to remove after installation.
4. Tighten down the screw
Once you’ve placed the screw into the hole, you then need to tighten the screw until it’s securely attached. Use a ratchet wrench to tighten the screw. Be sure to loosen the screw slightly each time you turn it until the screw is firmly locked into place.
5. Remove the screw
After tightening the screw, gently pull up on the tail of the screw to remove it. It should pop right out.
How to fix a stripped screw
When self-tapping screws aren’t installed correctly, they can become loose and fall out later on. To prevent this from happening, you should try tightening the screw down a little too much. Once the screw is securely tightened, you can then slowly back off and reinsert the screw.