Browse By

Category Archives: Home Improvement

How to Choose the Right affordable folding curtains for Your Home

Choosing the right window treatments can be a daunting task, but it’s important to take the time to find the perfect fit for your home. There are a few things to keep in mind when choosing soodsad voldikkardinad, including style, function, and budget. With a little bit of research, you can find the perfect curtains for your home.

Consider the size of your windows when selecting curtains

Deciding on curtains for your windows can be a difficult task, as there are countless styles and designs to choose from. One of the most important factors to take into account is the size of your windows. When selecting curtains, it’s important to measure the width and length accurately in order to ensure that you select curtains that fit correctly and provide adequate coverage on all sides. Another factor to consider is how much light you’d like to let in – you’ll need thinner, lighter fabrics if maximum natural light is desired. Taking into account the size of your windows when selecting curtains ensures that they serve their purpose while creating an inviting space that you will love spending time in.

Choose a color or pattern that compliments your home’s décor

When choosing a color or pattern to compliment your home décor, consider which mood or atmosphere you would like the room to project. Whether you want a calming light blue in the bedroom or an energizing floral pattern in the kitchen, you can find options that will fit perfectly with the existing theme of your house. To add personality and character to your home, try incorporating different textures. For example, pair a bright abstract wallpaper with a velvet upholstered furniture piece. Not only will this tie together pieces of furniture that have vastly different design styles, it will also bring fun and life into the room. Whatever way you choose to spruce up your home’s décor, make sure that it reflects your style and preferences.

Select a fabric that is easy to clean and maintain

When deciding on a fabric for furnishing items like upholstered chairs, seating, and bedding, it is important to consider how easy the fabric is to clean and maintain. One great option for those wanting an easy-to-clean fabric is polyester. Its moisture-wicking properties allow it to dry quickly and its resistance to wrinkles also makes it a good choice. Advanced polyester fabrics are designed with stain-resistant qualities meaning that even accidental spills or stains can be easily wiped away before they become permanent. Polyester offers comfort as well as practicality making it a great choice for those looking for affordable and long lasting furniture.

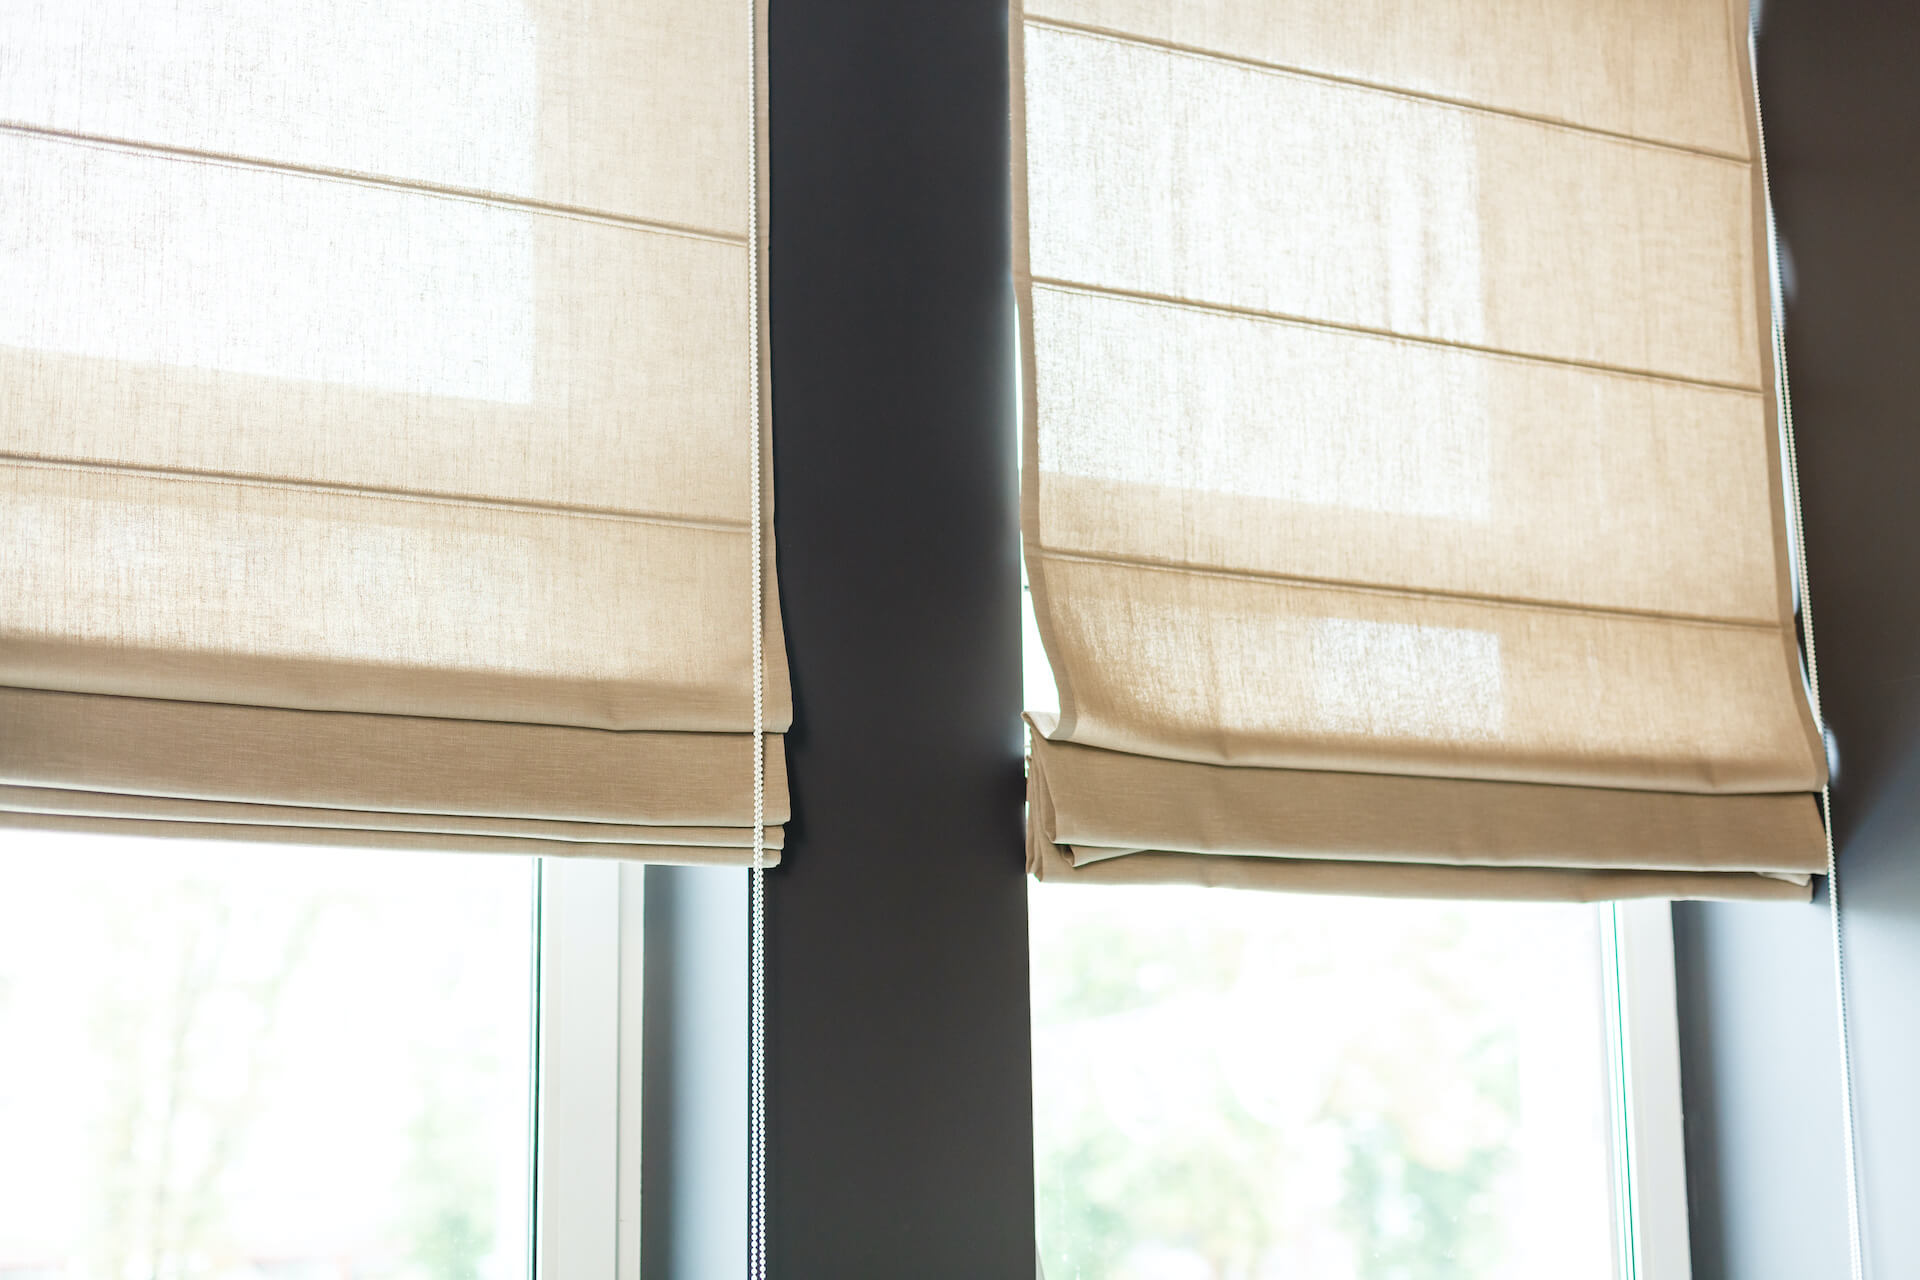
Determine if you want privacy or light control with your curtains

When shopping for curtains, it is important to think about your privacy and light control needs. Knowing exactly what you want in terms of privacy and light levels can help make the decision of which type of curtains to purchase much easier. If total privacy is your top priority, then blackout curtains may be best for you. However, if you want to let light into the room but maintain a sense of privacy, sheer or light-filtering fabric could be the best option. Having a combination approach – wearing two different types of curtains on one window – can also give you an ideal balance between light and privacy. By considering your specific needs for both private moments and natural lighting, you can find the perfect curtains to fit your space.

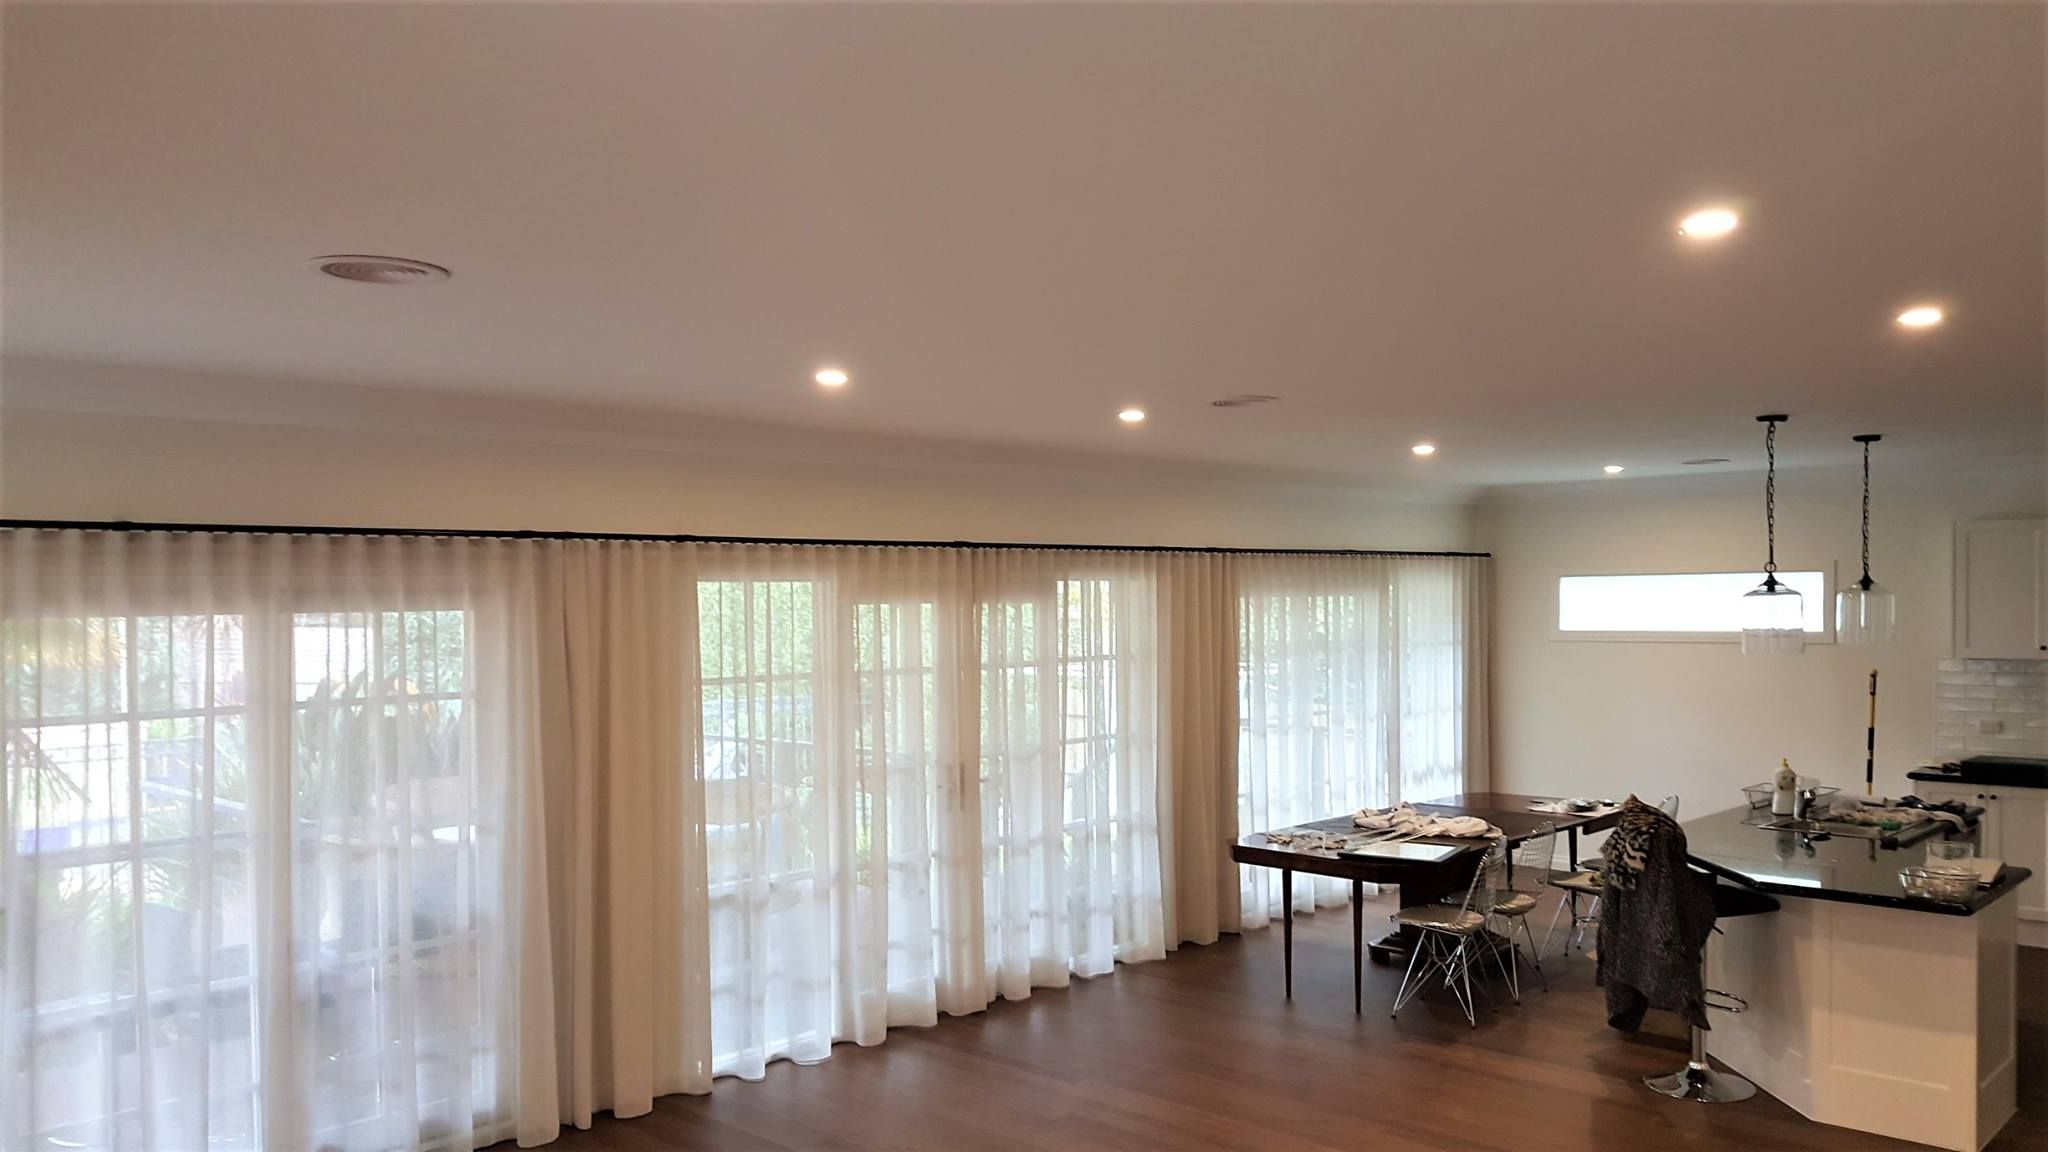
Consider the style of your home when choosing curtains

When designing the perfect window treatments for your home, it’s important to consider the existing style of the space so that the curtains you choose have a unifying and complementary aesthetic. The kind of material, texture, and pattern you select for your curtains should all be in-line with the existing decor in order to create a more harmonious balance. Sure, take risks if you want to make bold statements – but when unsure, opt for safety with draped fabrics that will blend easily with both traditional and modern decor. By doing this, you can ensure that whether it’s luxurious velvet or delicate cotton lace, your curtains will enhance the look of your home while keeping things looking cohesive and stylish.

Shop around to find the best prices on affordable folding curtains

Shopping for affordable folding curtains does not have to be a daunting task. With a bit of research and comparison-shopping, you can find the perfect curtains to fit your budget and style. Start by checking local retail stores and thrift shops for any discounts, then proceed to compare prices online from vendors from all over the world. Make sure to read reviews from customers so you know what quality you should expect. If possible, take advantage of free shipping or price matching in order to get the best deal on your curtains. In the end, it may take some time and effort, but finding affordable folding curtains will be worth it when you find something that looks great in your home and fits your wallet too!

Pruning- What Is It And How It Works In The Gardens?

The first thing to consider when planning your garden is what you’re going to grow. If you are a beginning gardener, then the most important thing for you to do is begin by focusing on what you enjoy eating and/or drinking.

This may seem like a simple task, but it can be difficult to come up with ideas that will appeal to your palate, or even if you think you have an idea in mind, make sure it is palatable enough for you to eat. You can always add vegetables to your list of favorites later once you’ve successfully grown them, but if you’re not growing something you love, you won’t stick with it.

Once you’ve decided which fruits or vegetables you want to plant, you need to decide where they are going to go in your landscape. This is often one of the most difficult things about landscaping, especially for beginners because you don’t know what plants will work well together. In order to get started, we recommend reading this article from About.com, which explains how to choose the right plants for your yard. It should also give you some good tips on choosing the best time to plant so that you avoid getting too much sun, wind and cold (and consequently killing off the plants).

After you’ve established exactly what you want to grow, you need to prepare the ground properly. We suggest digging holes for each new plant at least two feet deep, three inches wider than the root ball of the plant itself, and four feet apart.

Before you start planting anything, it is important to thoroughly wash all of the roots. Use a hose or a watering can, depending on what kind of soil you have, to rinse the roots until there is no dirt left clinging to them.

When you’re finished rinsing, take the plant out of its plastic bag and place it face down into the hole. Make sure that the base of the plant is covered with soil and water gently until the plant has rooted in place. Once the plant has been planted, cover the top of the hole with mulch.

You can find mulch at any nursery or home improvement store. Most people use bark mulch, although other types of mulches include leaf mold, straw, compost, wood chips and pine needles. The type of mulch you use depends entirely on the climate where you live. For example, if you live in a dry area, you might want to use straw. If you live somewhere that gets a lot of rain, you may want to use bark mulch instead.

Pruning

Many beginning gardeners tend to over-plant their gardens, hoping that more plants will mean bigger yields. This isn’t necessarily true. While larger plants will produce fruit or vegetables faster, smaller ones will be able to withstand colder temperatures better and are less likely to die.

If you are having trouble keeping plants healthy, it may be because you are pruning them incorrectly. Pruning is the practice of cutting back individual branches so that you can encourage growth in certain areas while encouraging flowering in others.

We would recommend using pruning shears whenever possible, because they allow you to cut back specific parts of the plant without damaging the rest. When pruning tomatoes, it is important to cut only those stems that are damaged and not leave any part of the plant exposed – or else you risk losing the entire tomato to disease.

Pruning shears are the best tool for pruning. Some gardening experts argue that these tools are actually harmful, because they can cause cuts if used incorrectly. However, we believe that pruning shears are safer to use than knives or scissors.

There are many different ways to prune different kinds of plants, but here are some examples:

Tomatoes: Cut the bottom third of the plant, leaving about one inch above ground. Then cut the second third of the plant, again leaving about one inch above ground. Finally, cut the top third of the plant, again leaving about one inch above ground. Repeat this process every few weeks, making sure to keep each section at least one foot away from the next. Your plants will grow faster if you don’t remove all of the leaves from the lower portion of the plant.

Peppers: After removing the stem and seeds, cut the tops of the peppers back to about one and a half inches below the surface of the soil. Then, after letting them grow for a month or so, cut back the top half of the plant as much as possible. Let the pepper grow for another couple months before you cut it back again. Do this every six weeks.

Cucumbers: Remove the outer leaves of the plant. Then, cut the stem just below the flower, taking care not to damage the cucumber inside. Let the cucumber grow for about 10 days, then cut the stem back to about one inch above the ground. Do this every five days until the plant reaches maturity.

Beets: Leave the beet green attached to the main stalk. Cut the tops of the beet greens back to about one inch above the soil line. Then let them grow for about two weeks. Then, cut the tops back to about one inch above the soil line. Continue this process every two weeks for four months. Then, when the beet greens are mature and ready to harvest, pick them and cook them immediately.

Onions: Choose a nice sunny spot for your onion garden, and dig a trench around 10 inches wide and 20 inches deep. Plant onions vertically in the trench, about 12 inches apart from one another. Water deeply and regularly for the first year. After that, you can water them just enough to keep the soil moist.

Garlic: Dig a shallow trench and plant garlic bulbs horizontally. Fill the trench with potting soil and press the garlic into the soil. Cover the bulbs with about six inches of soil, and fill in the area around the garlic with sand. Then let the garlic sprout for several weeks before harvesting.

Lettuce: Lettuce likes to be planted in rich, fertile soil, so you’ll want to amend your soil with manure before planting. First, dig a small hole that is about three inches deeper than the lettuce seedling itself. Add a tablespoon of manure to the hole, and then carefully insert the lettuce seedling into the hole. If you’re planting lettuce in a large garden, you can plant multiple rows side-by-side. Just remember to alternate rows to prevent the weeds from crowding out the plants.

First of all people have to consider the haljastustöö hind which is very necessary for all kinds of buyers. After this they have to think about all the important points which we have stated above for everyone. In this article we have discussed all about punning what is it and how does it works on landscapes. This is known as quite interesting task for everyone.

Why Building Inspection Is Being Done Before Buying The Building?

A building inspection is the only way to know for sure whether a building is safe and in good working order. A building inspection is also called a pre-purchase inspection or an “as-is” inspection, which means that it’s done before you buy the property.

While the idea of getting a building inspection can be scary, it’s important because if there are any major issues with your new home that were not identified in the building inspection, they could have serious repercussions on your new life.

If you want to avoid these types of problems, you should hire a professional building inspection company.

Who needs a building inspection?

The first step in choosing a building inspection company is deciding who needs one and what kind of inspection you need. There are three common scenarios where people would benefit from a building inspection:

You’re buying a new home: In this case, it’s very likely that your real estate agent has already conducted a preliminary inspection of the property. They may have found some minor issues that weren’t disclosed to you prior to signing a contract. It’s best to get a full building inspection done by someone else. The reason for this is simple: If you don’t know about the hidden issues before closing, you risk having them discovered after you move in. That could potentially mean a lot of headaches down the road.

You’re selling your existing home: Perhaps you bought your house years ago and now it’s time to sell. Or maybe you sold it recently but you still own it. Either way, you probably aren’t looking forward to doing all the work yourself. Instead, you should consider hiring a professional building inspector to do the job for you. This will save you time and money, and the inspection report will provide you with peace of mind as well.

You plan to renovate your home: If you’ve decided to renovate your current home, chances are you’ll need a building inspection just to make sure everything fits together properly. You’ll need this type of inspection when you add plumbing, electrical wiring or other items that might not fit into your original plans. Again, this is another situation where it’s better to leave the heavy lifting up to someone else. And if you’re planning to remodel your kitchen or bathroom, it’s best to get a second opinion before making any decisions.

There are many important things which one has to consider in their first building inspections such as they have to choose a good inspection company for it. The other thing is the person who is undergoing the process of this inspection has to understand the basic scenarios of it that will help them a lot in their first ever inspection of their life.

What happens during a building inspection?

Once you’ve chosen to get a building inspection, the next question is, “When does it happen?” The answer depends on how much work you want to do with your new home. If you’re moving in right away, then you can schedule the inspection at your convenience. Otherwise, you may want to wait until after you close on the house.

Most building inspections take anywhere from 3 to 5 hours to complete. During that time, the inspector will walk through each room of the building and point out anything that appears suspicious. Sometimes, they’ll conduct a visual check while pointing out any potential hazards. At times, they’ll even test doors and windows to see if they meet industry standards. Once they finish their inspection, they typically turn over a written report to you (and your lender) so that you can review it thoroughly.

Some inspectors will also give you a few pointers about things to watch out for when you move in. These suggestions include:

  • Check the foundation—are the walls level? Are the windows plumbed and sealed? Is the roof structurally sound?
  • Test the heating/cooling system—do the pipes leak? Is there a drafty window? Are the vents working properly?
  • Test the HVAC system—does the furnace or air conditioning unit look like it was installed improperly? Does the ductwork appear damaged?
  • Test the plumbing—does the water heater work properly? How many fixtures are left unfiltered? What about the toilets?
  • Test the electrical system—do the outlets seem wired correctly? Have wires been cut or exposed?
  • Test the appliances—are they properly grounded? Can you hear noises coming from the refrigerator or dishwasher?

In addition to testing the physical aspects of the building itself, most building inspectors will also test the mechanical systems inside the structure, such as the furnace, the heat pump(s), the water heater, etc. They’ll try to determine if the equipment is operating within its manufacturer’s specifications and if it seems like it could possibly fail in the future.

As you can see, a building inspection isn’t limited to looking for structural defects. Most inspectors will also go through the exterior of the home, checking for loose shingles, cracked gutters or siding, missing trim, rotted wood or broken windows. They’ll check the landscaping to make sure everything looks presentable and safe. Finally, they’ll inspect the interior of the home, including the cabinets, floors, ceilings, lighting, and more.

Should you use a local building inspector?

It doesn’t matter where your building inspection takes place; you can choose to use a local inspector or one located elsewhere. For example, if you live in a small town or rural area, you may not have access to a reputable building inspector. However, if you’re willing to drive a short distance to a qualified inspector, then it shouldn’t pose too big of a problem.

On the other hand, if you live in a larger city or metropolitan area, you may find it difficult to locate a reliable building inspector. You’ll probably have to do a bit of research on your own to find someone trustworthy. Fortunately, there are plenty of companies out there that specialize in conducting building inspections. Some offer online-based reports, while others require you to visit their offices. Whichever route you decide to take, you’ll want to make sure that the person conducting the inspection has at least five years of experience.

Finally, keep in mind that you can always use a third party service to handle the inspection. Many insurance companies offer services like Home Inspections Plus, which provides homeowners with a detailed report based on the results of a local building inspection. These reports cost between $60 and $100 depending on the size of your home.

How To Use Self-Tapping Screws

Many types of screws are available. Some screws require prepping and drilling before they can be used. But there is one type of screw that doesn’t need any prepping or drilling to install, which means it’s perfect for when you don’t have the right tools at hand.

“Self-tapping” is just another name for a “screw.” However, these self tap screws are designed with an extra feature that makes them much easier to use than other types of screws.

This special feature is called a “self-tapping” tip. Self-tapping screws are great because you can thread them into wood with ease without having to drill holes first. They also make installing drywall, metal studs, and wooden molding significantly faster and easier than using conventional screws.

In this article, we’ll take a look at how to use self-tapping screws.

What does a self-tapping screw look like?

A self-tapping screw usually has two parts: the head and the shank. The shank is what will eventually go into your work piece. It starts out as a long rod made from steel, aluminum, or other materials. At the end of the shank, there is a pointy bit called the “self-tapping” tip. This tip is what will actually pierce the work piece during installation.

The self-tapping tip is sharpened in the middle so that the head of the screw can grab onto the surface of the workpiece. When the self-tapping tip penetrates through the surface, it causes indentation on the opposite side of the workpiece. This indentation creates space where the head of the screw will fit snugly against the workpiece. Once the head is inserted, the shank of the screw can be turned until it’s fully seated. That’s all there is to it!

How do you know if you have a self-tapping screw?

If you’re wondering whether or not you’ve got a self-tapping screw, don’t worry. There are some clues that will help you figure it out. First off, all self-tapping screws should have a square head.

You may also notice that most self-tapping screws have a pointed tip at their end. If you see a flat end instead of a pointed tip, you probably don’t have a self-tapping screw. Flat tips only come in handy when you’re trying to attach things like metal framing and drywall.

Other types of screws vs. self-tapping screws

Sometimes you might find yourself dealing with more than one kind of screw. For example, there are common nails, lag bolts, and screws available. In most cases, you’ll want to pick up the appropriate screw for the job.

Screws for self-tapping

There are plenty of different self-tapping screws available to choose from. Most of them are constructed like regular screws but have a specific tip design that allows them to penetrate wood easily.

Some of the most popular self-tapping screws include:

Crown

Dentiliner

Driveline

Flathead

Ratcheting

Roundhead

Squarehead

Woodhead

For many projects, you won’t need to spend a lot of money on a specialized self-tapping screw. You’ll be able to get by with something like a standard screw. However, if you plan on doing lots of DIY projects over time, you definitely want to invest in a good set of self-tapping screws. These will save you tons of time and effort once you start working on larger jobs.

Common uses for self-tapping screws

While they’re primarily intended for woodwork, self-tapping screws are also useful when installing tile, metal framing, drywall, and plasterboard. Because of their versatility, self-tapping screws are often referred to as toggle fasteners or expansion fasteners.

Toggle fasteners are often used in carpentry, construction, and home improvement projects. By attaching items such as trim, molding, cabinets, and wall panels together, they provide an effective way to secure them temporarily while finalizing the project.

How to use a self-tapping screw

Once you have the proper screw on hand, let’s talk about how to properly install it.

1. Choose the correct tool

Before you begin installing a self-tapping screw, you must first determine the best type of screw to use. If you have the wrong self-tapping screw, you could damage your work surface.

Here are several factors to consider when choosing between different types of self-tapping screws:

Material

Shape

Size

Tip style

Color

Shape

Thread pitch

Head size and shape

Type of material

Shaft length

Once you have determined the type of self-tapping screw that best fits your needs, you can move forward with installation.

2. Prepping the surface of the workpiece

When dealing with wood, you should always pre-drill holes for self-tapping screws. The reason why this is important is because self-tapping screws tend to strip if they don’t have something to grab onto.

3. Place the tip of the screw into the hole

To ensure that your self-tapping screw goes in straight, you should make sure that the tip of the screw is resting squarely in the center of the hole you drilled. If the tip isn’t centered, your screw will be harder to remove after installation.

4. Tighten down the screw

Once you’ve placed the screw into the hole, you then need to tighten the screw until it’s securely attached. Use a ratchet wrench to tighten the screw. Be sure to loosen the screw slightly each time you turn it until the screw is firmly locked into place.

5. Remove the screw

After tightening the screw, gently pull up on the tail of the screw to remove it. It should pop right out.

How to fix a stripped screw

When self-tapping screws aren’t installed correctly, they can become loose and fall out later on. To prevent this from happening, you should try tightening the screw down a little too much. Once the screw is securely tightened, you can then slowly back off and reinsert the screw.

Important Things One Must Know About Cordless Drills

If you’ve recently purchased a cordless drill, welcome to the world of hand-held power tools. You may have seen them advertised on TV or in the paper but now that you’re actually going to buy one, you might be wondering about what they are and how to use them.

The truth is, there are many reasons why you would want to go with a cordless drill over your old standard model. First, they’re smaller and more portable than their corded counterparts. They also have the advantage of not needing an electrical outlet for charging batteries – which means no cords stretching across your living room floor. Finally, it’s easier to keep track of a set of batteries when using them in this way.

So, if you’re ready to switch from traditional corded drills to cordless ones, here are some tips to get you started.

Getting Started With Your New Drill

  • When you open up your new drill, you’ll see two main components:
  • Battery and Charger
  • Drill Motor

You can choose between rechargeable lithium ion (Li-ion) cells and NiMH (Nickel Metal Hydride) cells. Lithium ion cells tend to last longer and provide better performance, while NiMH cells offer a lower price tag. There’s also a third type of battery called Nickel Cadmium (NiCd), which used to be popular but has been discontinued due to poor longevity and safety concerns.

To charge batteries, plug in the charger into an AC outlet. The amount of time it takes to fully charge varies depending on several factors, such as the size of the battery you use, the capacity of the charger, etc. Most chargers come with instructions and will give you a full rundown of everything you need to know before you start using your new tool.

Once your batteries are fully charged, you should be able to turn your tool on by pressing and holding down the button for a few seconds. Once the light turns green, your batteries are good to go!

Now, let’s take a look at how to use your new drill.

How to Use a Cordless Drill

Anyone can use cordless drills but they just have to figure out all the things for once and then they will be able to know the things regarding it. You can also check it out on internet and you will also be able to find what is the best cordless drill under £100? As on internet you will be able to gather every single information regarding cordless drills.

Using your drill is easy enough once you figure out how to hold it properly. To operate your drill, simply put the bit into its holder and tighten the chuck. Then, insert the handle into the end of the body and pull it firmly back until the clutch engages.

Next, rotate the drill in the direction you want to move it. In other words, if you want to move left, press the button toward the right. If you want to move right, press the button toward the left.

Finally, release the clutch so that the drill moves forward.

There are other ways to operate your cordless drill, too. For example, you can twist the drill like you would a screwdriver and then drive it straight ahead. Or, you can twist the drill around the head of the bit and push it into place.

When you’re done working, just remove the bit from the chuck and store it in the appropriate compartment on the drill. Make sure to always store the batteries away from your drill and preferably out of reach of children or pets.

And, for those times when you don’t exactly remember where you stored your batteries, check out our guide to finding lost batteries quickly and easily.

Other Tips for Using a Cordless Drill

Since cordless drills are typically smaller than corded models, you’ll find that they fit better into tight spaces. This makes them perfect for jobs like drilling through tile grout, removing plasterboard, or cutting sheetrock.

They also make great companions for any job involving screws, nails, wood, metal, plastic, or any other materials that require you to drive bits into them. If you do find yourself having trouble getting the bit into the material, try switching to a different setting on your drill.

Cordless drills have another advantage. They’re lighter than corded models, which makes them easier to carry around and maneuver. And, since they don’t have cords hanging everywhere, you won’t have to worry about tripping over them.

In fact, it’s very common for people who own cordless drills to leave them plugged in all day. When you’re finished using them, simply unplug them and return them to the charger.

For more information about cordless drills, follow us on Twitter @PepsiCoProd and join in the conversation by posting your questions and comments below!